Showing posts with label windows 2k3. Show all posts

Friday, 17 August 2012

How to Create a Forward Lookup Zone in w2k3


DNS

This article is a step-by-step guide to creating a Domain Name System (DNS) zone for a new domain.

Note This article does not apply to Active Directory-integrated DNS zones. For additional information about how to setup DNS for Active Directory in Microsoft Windows Server 2003, click the following article numbers to view the articles in the Microsoft Knowledge Base:
(http://support.microsoft.com/kb/816101/ )
HOWTO: Convert DNS Primary Server to Active Directory Integrated
(http://support.microsoft.com/kb/323418/ )
HOW TO: Integrate DNS with an Existing DNS Infrastructure If Active Directory Is Enabled in Windows Server 2003
(http://support.microsoft.com/kb/324753/ )
HOW TO: Create an Active Directory Server in Windows Server 2003


How to Create a Forward Lookup Zone
To create a new forward lookup zone:
1.       Start the DNS snap-in. To do this, click Start, point to Administrative Tools, and then click DNS.
2.       Click the DNS Server object for your server in the left pane of the console, and then expand the server object to expand the tree.
3.       Right-click Forward Lookup Zones, and then click New Zone. The New Zone Wizard starts. Click Next to continue.
4.       Click Primary zone to create a master copy of the new zone. Click Next.
5.       In the Name box, type the name of the zone (for example, type _tcp.example.com, and then click Next.

NOTE: This name is typically the same as the DNS suffix of the host computers for which you want to create the zone.
6.       On the Zone File page, accept the default file name for the new zone file, and then click Next.
7.       Click Next.
8.       Click Finish.
The new zone is listed under Forward Lookup Zones in the DNS tree.

How to Modify the Forward Lookup Zone Properties
To modify or verify the zone properties:
1.       Start the DNS snap-in.
2.       Click the DNS Server object for your server in the left pane of the console, and then expand the server object to expand the tree.
3.       Expand Forward Lookup Zones.
4.       Under Forward Lookup Zones, right-click the zone that you want (for example, example.com), and then click Properties.
5.       In the Allow dynamic updates list, click Yes.
6.       Click the Start of Authority (SOA) tab.
7.       In the Responsible person box, type the e-mail address that you want (in the format of "username.domain.com"). For example, if the e-mail address is support@example.com, type support.example.com.
8.       Click Apply, and then click OK.

How to Create a Reverse Lookup Zone
To create a new reverse lookup zone:
1.       Start the DNS snap-in.
2.       Click the DNS Server object for your server in the left pane of the console, and then expand the server object to expand the tree.
3.       Expand Reverse Lookup Zones.
4.       Right-click Reverse Lookup Zones, and then click New Zone. The New Zone Wizard starts. Click Next to continue.
5.       Click Primary zone, and then click Next.
6.       In the Network ID box, type the network ID. For example, type 192.168.0, and then click Next.

NOTE: The network ID is that portion of the TCP/IP address that pertains to the network. For additional information about TCP/IP networks, click the article number below to view the article in the Microsoft Knowledge Base:
(http://support.microsoft.com/kb/164015/EN-US/ )
Understanding TCP/IP Addressing and Subnetting Basics
7.       On the Zone File page, click Next
8.       Click Next.
9.       Click Finish.
The new zone is listed under Reverse Lookup Zones in the DNS tree.

How to Modify the Reverse Lookup Zone Properties
To modify or verify the zone properties:
1.       Start the DNS snap-in.
2.       Click the DNS Server object for your server in the left pane of the console, and then expand the server object to expand the tree.
3.       Expand Reverse Lookup Zones.
4.       Under Reverse Lookup Zones, right-click the zone that you want (for example, 102.168.0.x Subnet), and then click Properties.
5.       In the Allow dynamic updates list, click Yes.
6.       Click the Start of Authority (SOA) tab.
7.       In the Responsible person box, type the e-mail address that you want (in the format of "username.domain.com"). For example, if the e-mail address is support@example.com, type support.example.com.
8.       Click Apply, and then click OK.
NOTE: When you create the forward and reverse lookup zones, the DNS service automatically creates an "A" record for the DNS server. However, it does not create a PTR record, or reverse lookup record, for the DNS server.

To create a PTR record for the DNS server:
1.       Right-click the reverse lookup zone (for example, 192.168.0.x Subnet), and then click New Pointer (PTR).
2.       In the Host IP number box, type the host portion of the DNS server IP address. For example, if the DNS server is on a "C" class network and has an IP address of 192.168.0.10, the host portion of the IP address is 10. In this case, type 10.
3.       In the Host name box, type the host name of the DNS server. For example, type dnsserv.example.com.
4.       Click OK.

How to Create a Host Record
To create a host or "A" record:
1.       Start the DNS snap-in.
2.       Click the DNS Server object for your server in the left pane of the console, and then expand the server object to expand the tree.
3.       Expand Forward Lookup Zones.
4.       Under Forward Lookup Zones, right-click the zone that you want (for example, example.com), and then click New Host (A).
5.       In the Name (uses parent domain name if blank) box, type the name of the host that you want to add. For example, if you want to add a host record for a Web server, type www.
6.       In the IP address box, type the IP address of the host that you want to add. For example, type 192.168.0.100.
7.       Select the Create associated pointer (PTR) record check box, and then click Add Host. You receive a message similar to the following:
The host record www.example.com was successfully created.
Click OK.
8.       When you are finished adding hosts, click Done.
How to Add a CNAME
A CNAME (or "Canonical Name") is an alias or an additional host name that is resolved to the IP address of an existing host computer in the DNS namespace. For example, if you use the same computer as both a Web server and an FTP server, you may want to resolve both the WWW host name and the FTP host name to the same IP address. Using a CNAME, you can resolve both names to the same IP address.

To create a CNAME:
1.       Start the DNS snap-in.
2.       Click the DNS Server object for your server in the left pane of the console, and then expand the server object to expand the tree.
3.       Expand Forward Lookup Zones.
4.       Under Forward Lookup Zones, right-click the zone that you want (for example, example.com), and then click New Alias (CNAME).
5.       In the Alias name box, type the alias that you want. For example, type ftp.
6.       In the Fully qualified name (FQDN) for target host box, type the fully qualified host name of the host computer that you want. For example, type www.example.com, and then click OK.

How to Add an MX Record
An MX (or "Mail Exchanger") record is used to identify a host computer as a Simple Mail Transport Protocol (SMTP)/Post Office Protocol (POP3) server. To add an MX record, follow these steps. Note that you must first create the "A" record for the mail server host.
1.       Start the DNS snap-in.
2.       Click the DNS Server object for your server in the left pane of the console, and then expand the server object to expand the tree.
3.       Expand Forward Lookup Zones.
4.       Right-click the zone that you want (for example, example.com), and then click New Mail Exchanger (MX).
5.       In the Fully qualified domain name (FQDN) of mail server box, type the fully qualified domain name of the host computer that acts as the mail server. For example, type mail.example.com.
6.       Click OK.

How to Add a Name Server
To identify an additional name server:
1.       Start the DNS snap-in.
2.       Click the DNS Server object for your server in the left pane of the console, and then expand the server object to expand the tree.
3.       Expand Forward Lookup Zones.
4.       Under Forward Lookup Zones, right-click the zone that you want (for example, example.com), and then click Properties.
5.       Click the Name Servers tab, and then click Add.
6.       In the Server fully qualified domain name (FQDN) box, type the host name of the server that you want to add. For example, type namesvr2.example.com.
7.       In the IP address box, type the IP address of the Name server that you want to add (for example, type 192.168.0.22), and then click Add.
8.       Click OK, and then click OK to return to the DNS window.
9.       Expand Reverse Lookup Zones, right-click the zone that you want, and then click Properties.
10.   Click the Name Servers tab, and then click Add.
11.   In the Server fully qualified domain name (FQDN) box, type the host name of the server that you want to add. For example, type namesvr2.example.com.
12.   In the IP address box, type the IP address of the Name server that you want to add (for example, type 192.168.0.22), and then click Add.
13.   Click OK, and then click OK again to return to the DNS window.
For additional information, click the following article number to view the article in the Microsoft Knowledge Base:
(http://support.microsoft.com/kb/323417/ )
HOW TO: Integrate Windows Server 2003 DNS with an Existing DNS Infrastructure in Windows Server 2003
(http://support.microsoft.com/kb/323380/ )
HOW TO: Configure DNS for Internet Access in Windows Server 2003
For additional information about installing and configuring DNS, click the following article number to view the article in the Microsoft Knowledge Base:
(http://support.microsoft.com/kb/172953/ )
HOWTO: Populate DBGrid from Crosstab Parameter Query
(http://support.microsoft.com/kb/238797/ )
Microsoft DNS Server Installation and Configuration Document Available on Windows NT FTP Site

Sunday, 8 April 2012

How to Read Windows Log Files

Reading Windows log files is an important part of maintaining proper operation and ensuring system security. In addition, log files can be extremely useful in troubleshooting Windows errors.

Only a Windows Administrator can read some Windows log files, such as the Security Event Log. Any system user can view other log files, such as logs that software applications created.

Each log contains a list of events that occurred, along with problems, failures, and warnings.

How to Read the Windows Application, Security, and Sytem Log Files

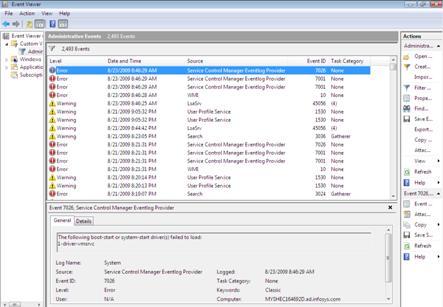
The Windows application, security, and system log files can be read with a Windows application called “Event Viewer,” which is accessed through the Control Panel:

  • Click the Start button on the desktop’s Taskbar
  • Click the Control Panel menu item 
  • The Control Panel’s window will open 
  • In the Control Panel, double-click the Administrative Tools icon 
  • The Administrative Tools window will open with a list of different icons 
  • Double click the Event Viewer icon 

How to Read Other Windows Log Files

Many log files that software applications use are written as plain text file, making it possible to use any freeware text editor, “Notepad” or “WordPad”, to read the generated log files. To read .txt files in WordPad:

  • Click the Start button on the desktop’s Taskbar 
  • Click All Programs option 
  • Click Accessories menu item 
  • Click WordPad application 
  • A new WordPad window will open 
  • Click the File menu 
  • Click the Open menu item 
  • Navigate to the desired log file and click the Open button 

There are also programs that allow the user to monitor log files as they occur in real-time. Examples of such software include Tail For Win32 and Hoo WinTail. These programs make it easy to read new entries from the bottom (tail) of the log file.

Read More : http://www.windowslogfiles.com/

How to Monitor Windows Server 2003

People monitor system resources in order to evaluate their computer workload, observe changes and trends in resource usage, test configuration changes, and diagnose problems.
Task manager presents a snapshot of programs and processes that are running on the computer and provides a summary of the computers processor and memory usage.

System monitor logs performance and memory usage and also generates alerts that provide detailed data about the resources by specific components of the operating system and computer.

Monitoring Event Logs
Events are user actions that are recorded based on an audit policy or any significant occurrence in Windows 2003 or in an application. Users monitor events to track and identify security events, resource use, or system and application errors. Windows 2003 observes 


Three types of logs:
  • Security events are recorded in the security log.
  • System events are recorded in the system log.
  • Application events are recorded in the Application log.

The Events log enables users to monitor information about hardware, software, system problems, and security. Users view these logs to detect activities and events that require attention.

System Logs contain events that Operating System components log. The Application Log contains events that Applications or Programs log. The Security Log contains events related to log on attempts and resource usage.

There are three types of System and Application events: Information, Warning, and Error.

Use Task Manager to Monitor System Resources
Task Manager provides real time information about applications currently running on systems, the processor and memory usage or any other data about those processors, and statistics on memory and processor performance.

Monitoring Programs: Use the task manager’s Application tab to view the status of applications running on the computer and to identify the process associated with an application.
Monitoring Processes: Use the Process tab to view a list of running processes and their measures. The processes and measures that appear run in their own address space, including all applications and system services. Both user and system can initialize a process but only a process that a user initializes can be ended.
Monitoring Performance: To monitor current computer performance, use the Performance tab. This tab displays a dynamic overview of the computers current performance including graph and numerical display of processor and memory usage.
Use System Monitor to Monitor System Performance
If a more detailed Performance overview than Task Manager is needed, use system monitor to obtain more comprehensive information about the computer or other computers on the network. Use system monitor to collect and view logged data about processor, disk, memory, network activity, etc. Use this information to diagnose how the system and applications are functioning to ensure that the system is being optimized. System Monitor information can be viewed in histogram, graph, or report form.

  • Objects: In system monitor, objects are major components or subsystems of the computer systems. They can be hardware such as hard disk or software such as process.
  • Instances: Instances are multiples of the same object type. For example, if a system has multiple processors, the processor object type will have multiple instances.
  • Counters: Counters gather data on different aspects of objects.
For example: the process object counters gather data on the processor time and then user time. Counters are built into the operating system and continuously capture data, whether it is visible in system monitor or not. If an object type has multiple instances, counters track status for each instance or the total of all instances.
Adding CountersBecause counters continually gather data on system performance, when counters are added, their displays in system monitor are being added.
Click Start, point to Programs, point to Administrative Tools, and click Performance.
Right click the System Monitor details pane then click Add Counters.
Click all counters or select counters from the list to choose individual counters.
If an object has instances, click all instances or select instances from the list to choose individual instances.
Click Add then Close the add counters dialog box.
After counters are added, their data can be viewed in real time. Data can be displayed in three ways:
  1. Histogram: Display data in a Bar chart.
  2. Report: Display Numerical data in columns.
  3. Chart: Display data in Line graph.

Alerts: Use alerts to notify a user or administrator when indications go beyond the limit specified. In addition, use performance logs to collect data on hardware resources, system services, and performance.

Alerts are useful when users are not actively monitoring a particular counter but want to be notified when it exceeds or falls below a specified value so that they can investigate and determine the cause of change. For example, a user can set an alert when the percentage of disk space usage exceeds 80% or the number of failed log on attempts exceed a specified number. There are three tasks involved in settings an alert. They are:
  • Select counters to track a specified system activity.
  • Set a threshold value for that activity.
  • Specify an action to take when the threshold is exceeded or falls below a specific value. The action can be to send a network message, run a program, or start a log.

Use performance logs and alerts in the performance console to set an alert. To set an alert do the following:
  • In the Console tree double click Performance Log and alerts then click Alert.
  • In the detail pane, right click new alert setting then provide a name for the alert.
  • On the General tab, enter a brief description of the alert setting file in the comment box.
  • Click Add to specify object counters and instances and updating information in the add counter dialog box.
  • After adding counters, specify properties for the sample interval and alert threshold on the general tab.
  • On the Action tab, ensure that log on entry in the application event log is selected. Specify a network message to be sent to the computer that triggers the alerts.

Wednesday, 4 April 2012

How to config DHCP Relay Agents


The Dynamic Host Configuration Protocol (DHCP) is a service that runs at the application layer of the TCP/IP protocol stack to dynamically assign IP addresses to DHCP clients, and to allocate TCP/IP configuration information to DHCP clients. This includes subnet mask information, default gateway IP addresses, DNS IP addresses, and WINS IP addresses. The DHCP protocol is derived from the Bootstrap Protocol (BOOTP) protocol. The DHCP server is configured with a predetermined pool of IP addresses (scopes), from which it allocates IP addresses to DHCP clients. During the boot process, DHCP clients request IP addresses, and obtain leases for IP addresses from the DHCP server.


When the DHCP client boots up on the network, the DHCP lease process occurs between the DHCP server and DHCP client. During the DHCP lease process, the DHCP scopes configured for a DHCP server is used to provide DHCP clients with IP addresses.


The DHCP lease process consists of four messages sent between the DHCP server and the DHCP client:
DHCPDISCOVER message: This message is sent by a client when it boots up on the network to request an IP address lease from a DHCP server. The message is sent as a broadcast packet over the network, requesting for a DHCP server to respond to it.
DHCPOFFER message: This message is a response to a DHCPDISCOVER message, and is sent by one or numerous DHCP servers.
DHCPREQUEST message: The client sends the initial DHCP server which responded to its request a DHCP Request message. The message indicates that the client is requesting the particular IP address for lease.
DHCPACK message: The DHCP Acknowledge message is sent by the DHCP server to the DHCP client and is the process whereby which the DHCP server assigns the IP address lease to the DHCP client.


Because the DHCPDISCOVER message is a broadcast message, and broadcasts only cross other segments when they are explicitly routed, you might have to configure a DHCP RelayAgent on the router interface so that all DHCPDISCOVER messages can be forwarded to your DHCP server. Alternatively, you can configure the router to forward DHCP messages and BOOTP message. In a routed network, you would need DHCP Relay Agents if you plan to implement only one DHCP server.


For DHCP to operate, all of client computers should be able to contact the DHCP server. DHCP relies on the network topology, and is in turn relied on by all TCP/IP based hosts within your networking environment. Therefore, if your network has multiple segments, you have to perform either of the following:
Place a DHCP server on each segment.
Place a DHCP Relay Agent on each segment.
Configure your routers to forward broadcast messages.


The DHCP Relay Agent makes it possible for DHCP broadcast messages to be sent over routers that do not support forwarding of these types of messages. The DHCP Relay Agent is therefore the routing protocol that enables DHCP clients to obtain IP addresses from a DHCP server on a remote subnet, or which is not located on the local subnet. If you have no configured DHCP Relay Agent, your clients would only be able to obtain IP addresses from the DHCP server which is on the same subnet. To enable clients to obtain IP addresses from a DHCP server on a remote subnet, you have to configure the DHCP Relay Agent on the subnet that contains the remote clients, so that it can relay DHCP broadcast messages to your DHCP server.


The systems that can use the DHCP Relay Agent are:
  • Windows NT Server. 
  • Windows 2000 Server. 
  • Windows Server 2003. 


In routed networks, you need to either enable your routers to forward DHCP broadcast messages or configure a DHCP Relay Agent for the following reasons:
The router will drop DHCP broadcast messages if it is not configured to forward them, and no DHCP Relay Agent exists.
The DHCP lease process would not be able to place. The initial message sent by the DHCP client is a broadcast message.
Configuring the DHCP Relay Agent


The process for configuring the DHCP Relay Agent is outlined below:
Enable Routing and Remote Access Server (RRAS).
Install the DHCP Relay Agent routing protocol.
Configure DHCP Relay Agent properties.
Configure/enable the DHCP Relay Agent on the router interface to forward DHCP broadcast messages.
View statistical information on the operation of the DHCP Relay Agent.


How to enable Routing and Remote Access Server (RRAS):Click Start, All Programs, Administrative Tools and then click Routing and Remote Access to open the Routing And Remote Access console.
Right-click the node of your server, and then choose Configure And Enable Routing and Remote Access from the shortcut menu.
The Routing and Remote Access Server Setup Wizard launches.
Click Next on the initial page of the wizard.
On the Configuration page, select the Custom Configuration option. Click Next.
On the Custom Configuration page, enable the LAN Routing checkbox. Click Next.
Verify your configuration settings on the Summary page.
Click Finish.
Click Yes when prompted to start the RRAS service.


How to install the DHCP Relay Agent routing protocol:Open the Routing And Remote Access console.
Expand the IP Routing node in the console tree.
Right-click the General node, and then select New Routing Protocol from the shortcut menu.
The New Routing Protocol dialog box opens.
Select DHCP Relay Agent.
Click OK.


How to configure DHCP Relay Agent properties:Click Start, All Programs, Administrative Tools and then click Routing and Remote Access to open the Routing And Remote Access console.
Expand the IP Routing node in the console tree.
Right-click the DHCP Relay Agent node, and then select Properties from the shortcut menu.
On the General tab, enter the IP address of the DHCP server in the Server Address text box, and click Add.
Repeat the above step for each DHCP server that you have to add.
Click OK.


How to enable the DHCP Relay Agent on a router interface:Click Start, All Programs, Administrative Tools and then click Routing and Remote Access to open the Routing And Remote Access console.
Expand the IP Routing node in the console tree.
Right-click the DHCP Relay Agent node and then select New Interface from the shortcut menu.
Select the interface that is on the same subnet as the DHCP clients.
Click OK.
In the DHCP Relay Properties dialog box, ensure that the Relay DHCP Packets checkbox is selected on the General tab.
You can change the Hop-Count Threshold and Boot Threshold values.
Click OK.


How to view statistical information on the operation of the DHCP Relay Agent:Click Start, All Programs, Administrative Tools and then click Routing and Remote Access to open the Routing And Remote Access console.
Select the DHCP Relay Agent node, and view the statistical information that is displayed in the details pane of the Routing And Remote Access console:
Received requests
Received replies
Discarded requests
Discarded replies

DHCP Scope


A DHCP scope is a valid range of IP addresses that are available for assignment or lease to client computers on a particular subnet. In a DHCP server, a scope is configured to determine the address pool of IPs that the server can provide to DHCP clients.
Scopes determine which IP addresses are provided to the clients. They should be defined and activated before DHCP clients use the DHCP server for its dynamic IP configuration. Users can configure as many scopes on a DHCP server as required in the network environment.

DHCP Scope Properties

DHCP Scope DHCP Scope
Scope PropertyDescription
Network IDThe network ID for the range of IP addresses
SubnetmaskThe subnet mask for the network ID
Network IP address rangeThe range of IP addresses that are available to clients
Lease durationThe period of time that the DHCP server holds a leased IP address for a client before removing the lease.
RouterA DHCP option that allows DHCP clients to access remote networks.
Scope nameAn alphanumeric identifier for administrative purposes.
Exclusion rangeThe range of IP addresses in the scope that is excluded from being leased.
Each subnet can have a single DHCP scope that has a single continuous range of IP addresses. Specific addresses or groups of addresses can be excluded from the range that the DHCP scope specifies. Normally, only one scope can be assigned to a subnet. If more than one scope is required on a subnet, the scopes must first be created then combined into a super scope.
For example, if there are two subnets, then users can create two separate scopes for the separate subnets on one DHCP server. Users create a separate scope because the subnets have different IP addressing schemes.

Configuring DHCP Scopes in the Microsoft DHCP Server

  1. Open the DHCP console.
  2. In the console tree, click applicable DHCP server.
  3. On the action menu, click applicable DHCP server.
  4. In the new scope wizard, click next.
  5. On the scope name page, configure the name and description.
  6. On the IP address range page, configure the start IP address, end IP address, andsubnet mask.
  7. On add exclusive page, configure the start IP address and end IP address if applicable. If there is one IP address exclusion, configure only that IP address as the start IP address.
  8. On the lease duration page, configure the days, hours, and minutes.
  9. On the configure DHCP option page, select “no, I will configure these options later.”
  10. On the completing new scope wizard page, click finish.
Browser Name:
Browser Version:
Browser Code Name:
User-Agent: