Showing posts with label General. Show all posts

Friday, 30 March 2012

Online bookmarking How it works..?

BookMark
Bookmarks have been around since books themselves. In fact, as long as people have bound together large stacks of paper and had trouble remembering where they last left off, anything from a small piece of parchment to a plastic strip with a frilly string has been enough for readers.


It makes sense, then, that the digital tool we use as a kind of placeholder for our favorite Web sites and pages is also called a bookmark. Whether it's a meticulously organized list of frequently visited sites or a few articles you'd like to save in order to finish later, most Web browsers allow us to bookmark pages and keep track of sites if we'd like to return to them. Remembering all of those long URLs, some of which have convoluted naming conventions, would take an extremely good memory. Want an example? The next time you're fooling around on YouTube, try remembering a video's specific URL. It's not so easy, is it?

However, bookmark tools, as useful as they are, have a minor downside. Let's say you're traveling for work, and you're staying in a hotel with Internet access. Your boss has sent you an e-mail that asks for an update on the research you're currently working on. Naturally, you've carefully kept track of every piece of information you've searched for over the past month. So, what's the problem? It's all bookmarked on your desktop computer, which is, of course, back at the office.

One Web site in particular, known as Delicious, offers a solution to this problem. Delicious, formerly known as Del.icio.us, is an online bookmarking destination where users can save bookmarked sites on a personal account. With a username and password, it's possible to call up your own unique database of links from practically anywhere in the world, regardless of whether or not you have your personal computer with you at the moment. And Delicious is more than just a bookmark site -- it's a social bookmarking site, which means there's also a focus on sharing along with storing.

Using Delicious

Although Web surfers usually can click and drag URLs or icons into their browser's bookmark folder or toolbar, saving bookmarks on Delicious is a little bit different. In fact, there's more than one way to add bookmarks to Delicious.

After setting up an account and getting your username and password ready, you can do one of three things once you come across a site you'd like to mark. Delicious recommends using a browser add-on. This installs a small application onto your Web browser (a button) that reads "Tag," and clicking on it brings up a separate window that lets you save the bookmark.

There's also what's called a bookmarklet, another small button that specifically goes onto your bookmarks toolbar. The third way, however, represents the original way to add a bookmark. By simply accessing the Delicious Web site and logging in, you can manually create a bookmark by clicking on "Save a new bookmark," which is often on the top right of every page. This last option is what comes in handy when you're not at your personal computer with the browser you normally use. And you can log into the Delicious home page from any computer with Internet access to keep track of your links.

Once you save a bookmark, you can also edit it, giving it a title, informative notes and tags. Tags, one-word descriptors that users can add to help remember and organize links, are one of the more important aspects of Delicious bookmarks, and we'll cover why they're so helpful in the next section.

It's good to remember that in order to save or edit a bookmark on Delicious, your browser should have Javascript enabled. This is for security reasons so personal data such as usernames and passwords won't be at risk, and although you can browse the site, you won't be able to store new information.

So where does the social networking aspect of Delicious come into play?

Benefits of Delicious
The immediate benefit from Delicious is the fact that users no longer need to use the browser that's running on their desktop or laptop to keep track of sites. If you're at work but need to bring up a link you found on your home computer the day before, you can find it easily if you thought to save it on Delicious. If you're on the move, whether you're at the library or even on vacation in a different country, an account with Delicious could make it easier and more efficient to recall bookmarks and save them for later use.

But Delicious is more than just a simple place for people to store their favorite Web sites on one account. There's a social, Web 2.0 aspect to Delicious that adds another level of interaction and communication to bookmarking. When you save a bookmark, you have the option of sharing it publicly. For instance, if you find a great article or blog post and save it publicly, anyone else searching Delicious can view the same link. On top of that, if you post a bookmark, other members can add that link to their set of bookmarks, too. Bookmarks that are popular get highlighted, and what naturally happens is that content that's considered to be more interesting or useful to users tends to make it to the top. You can go the opposite way, too. In other words, if you don't want anyone else seeing the sites you bookmark, you can mark them as private. Then, only you will be able to see your bookmarks.

Tags also play a big part in the social-media aspect of Delicious. Aside from helping you remember specific categories with simple, one-word descriptors -- for instance, an article about polar bears could have the tag "wildlife" or simply "bears" -- popular tags create a collective library across the site for people to share similar interests. These tags become their own URLs when you add them, so if you wanted to see everyone's bookmarks on wildlife, you can just visit http://delicious.com/tag/wildlife. You can add as many tags to a bookmark as you want; the only requirement is that the tag has to be one word since the tags will eventually become part of the URL. If you're tagging a subject on something with more than one word, it helps to use abbreviations or dashes, and Delicious provides a list of popular tag names when you're saving or editing bookmarks to make keyword selection a little easier.

Wednesday, 30 November 2011

Small Note on SVhost.exe


Svchost.exe groups are identified in the following registry key: HKEY_LOCAL_MACHINE\Software\Microsoft\Windows NT\CurrentVersion\Svchost
During system initialization, Windows 2000 creates several threads in the System process, called system worker threads that exist solely to perform work on behalf of other threads.
There are three types of system worker threads:
Delayed worker threads execute at priority 12, process work items that aren't considered time-critical, and can have their stack paged out to a paging file while they wait for work items.
Critical worker threads execute at priority 13, process time-critical work items, and on Windows 2000 Server installations have their stacks present in physical memory at all times.
A single hypercritical worker thread executes at priority 15 and also keeps its stack in memory. The process manager uses the hypercritical work item to execute the thread "reaper"
Function that frees terminated threads.

Friday, 25 November 2011

Quick Tip: Select files in Windows Explorer with check boxes

Takeaway: With one little tweak, you can change the behavior of Microsoft Windows Explorer to allow multiple file selection with check boxes.
In previous  we have presented several Windows Explorer tweaks that make the tool more efficient and, in some cases, just plain less frustrating. But there is one tweak we have yet to mention — the ability to select multiple files with check boxes.
While you can select multiple files in Windows Explorer by holding down the CTRL key for each mouse click, that is a two-handed procedure. However, with the check box feature turned on, you can select multiple files with one mouse-equipped hand. To turn on this feature, you will have to change a setting in the Folder and Search Options of Windows Explorer.


Change options

Open a session of Windows Explorer in a folder with numerous files, like the one shown in Figure A.

Figure A

Open Windows Explorer.
Click the Organize tab on the top menu and navigate to the Folder and Search Options menu item, as shown in Figure B.

Figure B

Navigate to the Folder and Search Options menu item.
When you get to the Folder Options screen, click on the View tab (Figure C). Notice some the changes we made to Windows Explorer before, such as showing hidden files and system files — two of my favorites.

Figure C

Click the View tab.
Scroll down the list of options and find the Use Check Boxes to Select Items entry in the list (Figure D) and check the box to activate the feature. Click OK to put it into effect.

Figure D

Check the Use Check Boxes to Select Items entry.
Now when you go back to the Windows Explorer window, you will see check boxes next to each file in the folder (Figure E). You will also see a check box that will check all the files in the folder.

Figure E

Now we have check boxes.
Stay on top of the latest Microsoft Windows tips and tricks with TechRepublic’s Windows Desktop newsletter, delivered every Monday and Thursday. Automatically sign up today!

Thursday, 24 November 2011

How to Change the Language on an iPod

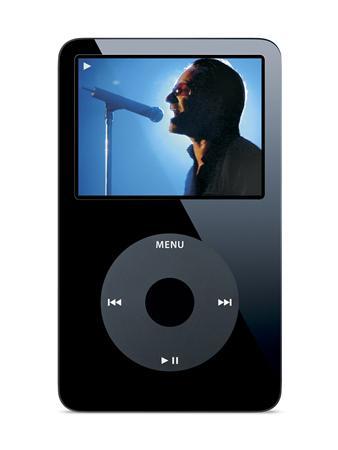
Language on an iPod How to Change the Language on an iPod

An iPod can display its settings in various languages and can be programmed to any language of choice. If you make a mistake and need to reset the language settings, just follow these simple instructions. They note the english name of the options to select, but also describe how to locate them even when you cannot read the current language.

Changing the Language on an iPod Nano

  1. The first task would be to remove your iPod from any computer it is attached to.
  2. Next go to the main menu by pressing the "Menu" button. It should then read "iPod" on the display screen.
  3. To choose the language of an iPod Nano, or later generation iPod, go to the bottom of the Menu screen until you reach the "Settings" option.
  4. Choose "Settings" by selecting it. At this point you should now have opened the "Settings" menu. The "Settings" option to choose is located on the list as the second option from the bottom.
  5. Then in the "Settings" menu go down until you highlight the "Language" selection.
  6. Choose the "Language" option. At this point you should now be inside the "Language" menu. The "Language" option to choose is located on the list as the third option from the bottom.
  7. Choose the language you would like to display on your iPod based on the list provided.

Changing the Language on a Photo iPod

  1. Go down to the Settings selection underneath the main menu. The "Settings" choice would be located as the third option under the main menu.
  2. The "Language" selection should be located as the third option from the bottom, in the "Settings" menu.

Changing the Language on an Older iPod

  1. After entering the main menu, go down to the "Settings" option in this menu. The "Settings" menu is also located as the third option for you to choose.
  2. Enter the "Settings" menu, and move down to the "Languages" option. The "Language" option should be located as the third selection before reaching the bottom of the screen.
  3. Select the language from the list provided that you want your iPod to display.
If the reason you are trying to change the language displayed on your iPod is because of a mistake made, there is also the option of changing the global settings on your iPod, back to its original factory settings. To do this reconnect your iPod to the computer and use restore it to the factory settings using the iPod Updater.

Tuesday, 18 October 2011

Migrating to Symantec Endpoint Protection 11.0 RU6

Things to know to ensure a successful migration
The following is a list of critical information that you need to know in order for your migration to succeed.

Migration paths
Symantec Endpoint Protection 11.0.6 (RU6) can migrate seamlessly over the following:
    • Symantec Endpoint Protection 11.0.780.1109/11.0.776.942 (RTM), 11.0.1000.1375 (MR1), 11.0.1006 (MR1 MP1), 11.0.2000.1567 (MR2), 11.0.2010.25 (MR2 MP1), 11.0.2020.56 (MR2 MP2), 11.0.3001.2224 (MR3), 11.0.4000.2295 (MR4), 11.0.4010.19 (MR4 MP1), 11.0.4014.26 (MR4 MP1a), 11.0.4202.75 (MR4 MP2), and 11.0.5002.333 (RU5)
    • Symantec AntiVirus client and server 9.x and later
    • Symantec Client Security client and server 2.x and later

For more information, see the Symantec Knowledge Base article Migration paths for Symantec Endpoint Protection 11.0.

Supported platforms
Supported platforms for Symantec Endpoint Protection 11.0.6 (RU6) are listed in the document System requirements for Symantec Endpoint Protection and Symantec Network Access Control 11.0.6.

Downloading the Symantec Endpoint Protection 11.0.6000.550 or 562 RU6 or RU6a Release Update
The installer package to upgrade Symantec Endpoint Protection is available from the Symantec FileConnect site: https://fileconnect.symantec.com/

Migration overview
The following table gives an overview of the migration process for each component of Symantec Endpoint Protection:
Component Migration overview
Symantec Endpoint Protection Manager When you migrate a server, the installation automatically detects and configures it appropriately.

You do not need to uninstall management servers before you install the new version. The overinstall process saves legacy settings, and then upgrades to the latest version.
Symantec Endpoint Protection
Clients
When you migrate a client, the overinstall automatically detects the client, and migrates and installs it appropriately. You do not need to uninstall existing clients before you install the new version.


Overview of the migration process
Migration to the current version of Symantec Endpoint Protection includes the following steps in order:
  • Create a migration plan
    Before you begin to install the Symantec Endpoint client, manager, and any administration upgrades, you should have a solid understanding of your network topology and a streamlined plan to maximize the protection of the resources on your network during the upgrade. Symantec strongly recommends that you migrate the entire network to the current version rather than managing multiple versions of Symantec Endpoint Protection.
  • Backup up the database
    Before you upgrade, you should back up the database.
  • Disable replication
    If your site uses replication, you must disable replication before upgrading Symantec Endpoint Protection Manager. You must disable replication at each site that replicates.
  • Stop the Symantec Endpoint Protection Manager service
    Before you upgrade, you must manually stop the Symantec Endpoint Protection Manager service on every management server in your site. After you upgrade, the service is started automatically.
    WARNING: You must stop the Symantec Endpoint Protection Manager service before you upgrade, or you will corrupt your existing installation of Symantec Endpoint Protection Manager.
  • Upgrade the Symantec Endpoint Protection Manager
    You do not need to uninstall management servers before you install the new version. The overinstall process saves legacy settings, and then upgrades to the latest version.
  • Enabling replication after migration
    After you migrate all servers that used replication, including the servers that were configured for failover and load balancing, you must re-enable replication. After migration, you add a replication partner to enable replication. You only need to add replication partners on the computer on which you first installed the management server. Replication partners automatically appear on the other management servers.
  • Upgrade the Symantec Endpoint Protection Clients
    You do not need to uninstall previous clients before you install the new version. The overinstall process saves legacy settings, and then upgrades to the latest version.


Backing up the database
Before you upgrade, you should back up the database.
    To back up the database
    1. Click Start > Programs > Symantec Endpoint Protection Manager > Database Back Up and Restore.
    2. In the Database Backup and Restore dialog box, click Back Up.
    3. When asked "Are you sure you want to back up the database?" click Yes.
    4. When you see the message "The database has been backed up successfully," click OK.
    5. In the Database Backup and Restore dialog box, click Exit.

Disabling replication
If your environment utilizes replication, you must disable replication on all sites prior to upgrading the Symantec Endpoint Protection Manager. You must not re-enable replication between sites until they are running the same version of the software.
    To disable replication
    1. Log on to the Symantec Endpoint Protection Manager Console.
    2. On the Admin tab, click the blue Servers tab at the bottom of the pane.
    3. On the Servers tab, in the left pane, expand Local Site > Replication Partners.
    4. For each site that is listed under Replication Partners, right-click the site, and then click Delete.
    5. In the Delete Partner prompt, click Yes.
    6. Log off of the console, and repeat this procedure at all sites that replicate data.
Stopping the Symantec Endpoint Protection Manager service
Before you upgrade, you must manually stop the Symantec Endpoint Protection Manager service on every management server in your site. After you upgrade, the service is started automatically.

WARNING: You must stop the Symantec Endpoint Protection Manager service before you perform this procedure or you will corrupt your existing installation of Symantec Endpoint Protection Manager.

    To stop the Symantec Endpoint Protection service
    1. Click Start > Settings > Control Panel > Administrative Tools.
    2. Double Click Services to launch the Services MMC snap-in.
    3. In the Services window, under Name, scroll to and right-click Symantec Endpoint Protection Manager.
    4. Click Stop.
    5. Close the Services window.
      Warning: You must close the Services window, or your upgrade may fail.
    6. Repeat this procedure for all Symantec Endpoint Protection Managers.
Upgrading the Symantec Endpoint Protection Manager
You must upgrade all Symantec Endpoint Protection Managers on which you stopped the Symantec Endpoint Protection service.
    To upgrade Symantec Endpoint Protection Manager
    1. Download and unzip the Release Update.
    2. Browse to the location where you unzipped the Release Update.
    3. Double-click setup.exe to start the installation.
    4. In the Symantec Endpoint Protection panel, click Install Symantec Endpoint Protection Manager.
    5. In the Install Wizard Welcome panel, click Next.
    6. At the License Agreement panel, select "I accept..." then click Next.
    7. At the Ready to install the Program panel, click Install.
    8. In the Install Wizard Completed panel, click Finish.
    9. In the Upgrade Wizard Welcome panel, click Next.
    10. In the Information panel, click Continue.
    11. When the upgrade completes, click Next.
    12. In the Upgrade Succeeded panel, click Finish.

Repeat the above steps on all other Symantec Endpoint Protection Managers on which you stopped the Symantec Endpoint Protection Manager service.
Enabling replication after migration
After you migrate all servers that used replication including the servers that were configured for failover and load balancing, you must re-enable replication. After migration, you add a replication partner to enable replication. You only need to add replication partners on the computer on which you first installed the management server. Replication partners automatically appear on the other management servers.
    To enable replication after migration
    1. Log on to the Symantec Policy Management Console if you are not logged on.
    2. On the Admin tab, click the blue Servers tab at the bottom of the pane.
    3. On the Servers tab, in the left pane, expand Local Site, and then click Add Replication Partner.
    4. In the Add Replication Partner panel, click Next.
    5. In the Remote Site Information panel, enter the identifying information about the replication partner, enter the authentication information, and then click Next.
    6. In the Schedule Replication panel, set the schedule for when replication occurs automatically, and then click Next.
    7. In the Replication of Log Files and Client Packages panel, check the items to replicate, and then click Next.
      (Replicating packages generally involves large amounts of traffic and storage requirements.)
    8. To complete the Add Replication Partner Wizard panel, click Finish.
    9. Repeat this procedure for all computers that replicate data with this computer.
Upgrading the Symantec Endpoint Protection clients
The easiest way to migrate Symantec Endpoint Protection clients is by using the auto-upgrade feature. All other client software deployment methods are supported, but the auto-upgrade approach is the easiest way. The client migration installation can take up to 30 minutes. It is recommended to migrate when most users are not logged on to their computers.

Note: Test this migration approach before rolling out migration to a large number of computers. Create a new group and place a small number of client computers in that group for testing purposes.

    To migrate client software
    1. Log on to the newly migrated Symantec Endpoint Protection Manager Console.
    2. Click Admin > Install Packages.
    3. In the lower-left pane, under Tasks, click Upgrade Groups with Package.
    4. In the Welcome to the Upgrade Groups Wizard panel, click Next.
    5. In the Select Client Install Package panel, all existing client packages are listed in the drop down box. Select one of the following:
      • Symantec Endpoint Protection .
      • Symantec Network Access Control .
    6. Click Next.
    7. In the Specify Groups panel, check one or more groups that contain the client computers to be migrated, then click Next.
    8. In the Package Upgrade Settings panel, check Download client from the management server.
    9. Click Upgrade Settings.
    10. In the Add Client Install Package dialog box, on the General tab, specify whether or not to keep existing client features or specify new ones, then configure a schedule for when to migrate the client computers. Under the Notification tab, specify a message to display to users during the migration.
      • If the clients in the group run a version of Symantec Endpoint Protection previous to MR2, turn off scheduling. Scheduling is on by default when a new client install package is added to a group. If scheduling is turned on, the upgrade fails. To turn off scheduling, in the Add Client Install Package dialog box, uncheck Upgrade Schedule.
    11. For details about settings on these tabs, click Help.
    12. Click OK.
    13. In the Upgrade Groups Wizard dialog box, click Next.
    14. In the Upgrade Groups Wizard Complete panel, click Finish.
Note: Client computers that take a long time to automatically upgrade to Release Update 6 (RU6) may need to be restarted. This occurs on client computers that run Windows Vista or Windows Server 2008.

Understanding the New Hyper-V Feature in Windows Server 2008

This article was written by MetroTek Geek from Metrotek Solutions, a provider of Computer Help in the DC area.

Microsoft Windows Server 2008 goes virtual with Hyper-V
As part of the Windows Server 2008 launch, Microsoft officially ushers in the era of true Windows server virtualization with Hyper-V. It used to be that virtualization was only found in the datacenters of companies like Amazon and their EC2 computing cloud. Now, Microsoft brings virtualization to the rest of us. Windows Server 2008 and Hyper-V come at the perfect time. With processor architecture shifting away from increasing speeds and towards multiple cores, virtualization will be a significant server-space trend in the near future.
clip_image001
Multiple Servers. One Box. Lots of RAM.
Hyper-V is a type-1 (native) hypervisor, meaning it runs at the root level with direct control over the server’s hardware. Virtual operating systems run independently of each other as partitions just above the Hyper-V stack. With server virtualization, you are essentially running multiple servers on one physical box. Previously, the only server virtualization product available from Microsoft was Virtual Server 2005 which ran as a type-2 (hosted) hypervisor over a macro operating system like Windows Server 2003. This meant the Virtual Server 2005 hypervisor did not have direct hardware access. Guest operating systems within Virtual Server 2005 were essentially threaded applications running through a macro-kernel. Hyper-V replaces the operating system layer and runs as a true type 1 micro-kernel hypervisor.
image  
image  
There are two key requirements for running Hyper-V: an x64 edition of Windows Server 2008 and a 64-bit processor with hardware assisted virtualization extensions (like those found in the Intel VT or AMD-V line of processors). Although Hyper-V requires a 64-bit working environment, guest operating systems may be 32 or 64-bit. Supported guest operating systems (the ones you want virtualized) include the following*:
  • Windows Server 2008
  • Windows Server 2003
  • Windows 2000 Server
  • Windows Vista
  • Windows XP Professional
  • SUSE Linux Enterprise Server 10
    * Other operating systems may work but are not supported in an official capacity
You may have noticed that Hyper-V requires a 64-bit environment. Not surprising given the 4 GB memory limitation found in 32-bit architecture. Four gigabytes divided over multiple instances just doesn’t cut it anymore. Fortunately, Windows Server 2008 Enterprise and Datacenter editions with Hyper-V can support up to 2 terabytes of physical memory and 64 gigabytes of memory per virtual instance. That’s a lot of memory!
Quick Migration and High Availability
Virtualized servers will benefit almost immediately from the ability to quickly migrate from one physical server to another. Microsoft Hyper-V with Quick Migration can save the state of a guest virtual operating system to shared storage, move the storage connection from one server to another, and then restore the image to the new server. Quick Migration works in tandem with the Windows Server 2008 Enterprise and Datacenter Clustering service to provide high availability and rapid disaster-recovery capabilities for your clustered servers. Whether it’s planned (maintenance) or unplanned (disaster recovery), the use of virtualization technology increases server uptime and availability.
Virtual Appliances
The virtual appliance is a promising new development available with virtualization. Vendors can package an operating system and all necessary software to run their product into a virtual “black box” image. This image can then be deployed on different machines even if the configuration is different. Virtual appliances can reduce the installation, configuration, and maintenance costs associated with managing and deploying multiple layers of software. The Microsoft Virtual Hard Disk (VHD) test drive program is a great example. From the VHD website, “The Microsoft Virtual Hard Disk (VHD) format is the common virtualization file format that provides a uniform product support system, and provides more seamless manageability, security, reliability and cost-efficiency for customers. The VHD format captures the entire virtual machine operating system and the application stack in a single file.” As virtualization becomes more prevalent, we’ll begin to see even more innovative and useful virtual appliances.
To V or not to V
Server virtualization represents the next logical step in efficient server-space progression. As servers begin shifting to multi-core architecture and 64-bit platforms, virtualization should become an increasing factor in optimizing server workload performance and reducing costs, especially as server proliferation becomes a growing problem. What was once strictly within the realm of datacenters and development labs is now becoming IT reality. Although there are some performance issues to consider, you might find the advantages of virtualization are well worth the investment.

How to Install or Enable Hyper-V Virtualization in Windows 8


sshot-13
Windows 8 includes Hyper-V as a virtualization platform, but since not everybody will use this feature, it’s not enabled by default. Here’s how to enable it on your Windows 8 PC.

Confusion

Hyper-V only allows you to create a new virtual machine on 64-bit versions of Windows 8, but the client tools are available on both versions. If you are running 32-bit, you’ll be able to do the installation, but you won’t be able to actually use it to create a new VM.

Installing or Enabling Hyper-V

Hyper-V is installed in the add features section of the add or remove programs dialog. To get there we need to open a run box by pressing Win+R, now type appwiz.cpl and press enter. You could also get to the Programs and Features box through Control Panel or the Start search, but this is easy and geeky.
sshot-2
Once the Programs and Features dialog opens, select the Turn Windows features on or off link on the left hand side.
sshot-3
When the Windows Features open, check the Hyper-V option. Then click Ok.
sshot-8
Windows will now add the Hyper-V binaries to your Windows installation.
sshot-7
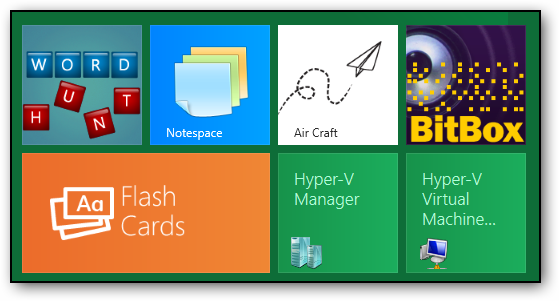
You can now launch the Hyper-V manager from the Metro dashboard.
sshot-6
sshot-10

Monday, 17 October 2011

How can I determine if my computer/operating system is 64-bit?


Windows If you are using Windows 7, click Start -> Control Panel -> System and Security -> System. The System type: line will give you the Operating System type:
Windows Vista users should click Start -> Control Panel -> System and Maintenance -> System. The System type: line will give you the Operating System type:
If you are using Windows XP, click Start -> Run and type dxdiag. If a Windows dialog box is displayed asking if you want to verify your drivers, you can safely click No and continue. When the program has finished loading, you should see something similar to one of the following images:
   
The Operating System line, refers to Windows x64 or 64-bit edition. The last image above specifies the processor Itanium, which is a 64-bit processor.

Mac

Select About this Mac from the Apple menu. The text below Mac OS X will give the operating system version, and the Processor line will give you the processor type.
about this mac
Mac OS X 10.5 (or greater) is a 64-bit operating system. Intel Core 2 Duo, Intel Xeon, and PowerPC G5 are 64-bit processors. However, 64-bit Stata for Mac is available only for 64-bit Intel-based Macs.
All currently shipping Macs have a 64-bit processor and a 64-bit operating system.

Unix (IBM-AIX, Sun Solaris)

  • IBM-AIX

    The getconf command will return the configuration of your machine. Since you are looking only for the kernel parameters, you should type

    [cph@anna ~]$ getconf -a | grep KERN
    KERNEL_BITMODE: 64

    If that fails or does not return a result, try the file command.

    [cph@anna ~]$ file /usr/lib/boot/unix*
    /usr/lib/boot/unix: 64-bit XCOFF executable or object module not stripped
    /usr/lib/boot/unix_64: 64-bit XCOFF executable or object module not stripped
    /usr/lib/boot/unix_mp: executable (RISC System/6000) or object module not stripped
    /usr/lib/boot/unix_up: executable (RISC System/6000) or object module not stripped

    [cph@ozona ~]$ file /usr/lib/boot/unix*
    /usr/lib/boot/unix: symbolic link to /usr/lib/boot/unix_up.
    /usr/lib/boot/unix_kdb: executable (RISC System/6000) or object module not stripped
    /usr/lib/boot/unix_up: executable (RISC System/6000) or object module not stripped

    We can see that 'anna' is a 64-bit capable platform, and 'ozona' is only 32-bit.
  • Sun Solaris

    Sun's platforms transitioned to 64-bit over a period of time, making identifying the platform for 64-bit compliance tricky. Sun has stated:

    Sun has implemented its 64-bit operating system in phases. The Solaris 2.5 Operating Environment provided support for increased precision with 64-bit math and also included support for 64-bit asynchronous I/O. The Solaris 2.6 Operating Environment added support for large datasets with large (1 Terabyte) filesystems while allowing co-existence of 32-bit and 64-bit files. Beginning with the Solaris 7 Operating Environment, Sun introduced support for large virtual address spaces with a full 64-bit operating system. Sun began shipping 64-bit hardware in 1995. By phasing in operating system support for 64-bits Sun has provided 64-bit features as the market has demanded them while guaranteeing compatibility for existing 32-bit applications.

    To determine what kind of binaries your Solaris machine can run, try the following:

    eden:/home/cph: isainfo -v
    64-bit sparcv9 applications
    32-bit sparc applications

    You can see that this Solaris machine is capable of running 32-bit as well as 64-bit applications. If isainfo fails, running a 64-bit application on your Sun will generally not be possible, unless of course isainfo is not in your path or has not been installed. You can also use the uname command to glean more information:

    eden:/home/cph: uname -a
    SunOS eden 5.8 Generic_108528-05 sun4u sparc SUNW,Ultra-5_10

    lagrange:/usr/users/cph: uname -a
    SunOS lagrange 5.5.1 Generic_103640-29 sun4u sparc SUNW,Ultra-1


    SunOS/Solaris versions map to the following:
    SunOS SOLARIS
    5.3 2.3
    5.4 2.4
    5.5 2.5
    5.5.1 2.5.1
    5.6 2.6
    5.7 or greater is 64-bit compliant 2.7 or greater is 64-bit compliant

    While all UltraSparc processors are capable of 64-bit computing, the OS release level may be the limiting factor. In the above excerpt, 'eden' (SunOS 5.8) is a fully compliant 64-bit platform, and 'lagrange' (SunOS 5.5.1) is a 64-bit UltraSparc limited to 32-bit computing.

Linux

Linux users should type the uname command. Depending on the platform, you may see

[cph@gaylord ~]$ uname -a
Linux gaylord.stata.com 2.6.11-1.27_FC3 #1 Tue May 17 20:24:57 EDT 2005 x86_64 x86_64 x86_64 GNU/Linux

[cph@caddo ~]$ uname -a
Linux caddo.stata.com 2.6.9-5.0.5.EL #1 SMP Fri Apr 8 14:20:58 EDT 2005 ia64 ia64 ia64 GNU/Linux

[cph@tango ~]$ uname -a
Linux tango.stata.com 2.6.10-1.771_FC2smp #1 SMP Mon Mar 28 01:10:51 EST 2005 i686 i686 i386 GNU/Linux
In the above listing, 'gaylord' (x86_64 GNU/Linux) and 'caddo' (ia64 GNU/Linux) are 64-bit compliant. 'tango' (i386 GNU/Linux) is only a 32-bit platform.

How To Check If Computer Is Running A 32 Bit or 64 Bit Operating System.

You can use the following registry location to check if computer is running 32 or 64 bit of Windows Operating System:

HKLM\HARDWARE\DESCRIPTION\System\CentralProcessor\0

You will see the following registry entries in the right pane:

Identifier         REG_SZ                     x86 Family 6 Model 14 Stepping 12
Platform ID    REG_DWORD          0x00000020(32)

The above “x86” and “0x00000020(32)” indicate that the Operating System version is 32 bit.

You can also a simple batch file to check the setting on remote computer:

*** Start ***

@echo off

Set RegQry=HKLM\Hardware\Description\System\CentralProcessor\0

REG.exe Query %RegQry% > checkOS.txt

Find /i "x86" < CheckOS.txt > StringCheck.txt

If %ERRORLEVEL% == 0 (
    Echo "This is 32 Bit Operating system"
) ELSE (
    Echo "This is 64 Bit Operating System"
)

*** End ***

You can use PSEXEC (a tool from Sysinternals) to run this script remotely redirect the output in a Text file.

To query registry entry on a remote computer you can use the following statement with Reg.exe:

Reg.exe Query \\computer_name\%Reg_Qry% > checkOS.txt

Please note that you can use the below registry entry to identify the processor architecture:

HKLM\SYSTEM\CurrentCongtrolSet\Control\Session Manager\Envirornment.

You can see the below registry entry in the right pane of the registry editor:

PROCESSOR_ARCHITECTURE   REG_SZ         x86

Friday, 14 October 2011

Outlook files remain on the hard disk after you remove Outlook 2003 or Outlook 2007

By default, Outlook user data files remain on the hard disk after you remove Outlook. The Outlook user data files remain in case you reinstall Outlook. For example, when you remove Outlook, all Personal Folder files (.pst) remain on the hard disk. When you reinstall Outlook, you can use the .pst files that remain on the hard disk after you remove Outlook.

To locate the Outlook user data files that remain on your hard disk, follow these steps:
  1. Click Start, point to Programs, point to Accessories, and then click Windows Explorer.
  2. Locate the Outlook user data files in the following folder:
    C:\Documents and Settings\%username%\Local Settings\Application Data\Microsoft\Outlook
If you do not want the files to remain on the hard disk, you must remove the files manually. To remove the files manually, locate the files on your hard disk, and then delete the files. By default, the folder that contains the Outlook user data files is hidden. To view these files, follow these steps:
  1. Double-click My Computer.
  2. On the Tools menu, click Folder Options.
  3. Click the View tab.
  4. Click to select the Show hidden files and folders check box.
  5. Click OK.

How to set up a network for Small Office / Home Office Computers

This overview will help you set up a network for two or more computers in your Small Office / Home Office (SOHO).
Many people are unaware of how easy and inexpensive it is to interconnect existing computers to form a small Local Area Network (LAN). If you are using Windows 98/XP, no additional software is required to enjoy basic network functions such as shared use of directories, drives, or printers and the hardware costs are minimal. A network can substantially simplify internet access for two or more people. Of course another reason for setting up a network is to play multiplayer games such as Quake or use "groupware" applications such as shared calendars, contact lists, todo lists, etc.

Configuring and connecting networking hardware

The standard networking technology is Ethernet. Ethernet works by means of adapters known as Network Interface Cards (NICs) in each computer. The NICs are connected with cables which vary depending on the cabling option chosen.  Many recent computers have built-in (motherboard) network capability.
Ethernet comes in two flavors. Fast Ethernet operates at 100 Megabits per second (Mbps) and is overkill for a SOHO. Regular or original Ethernet operates at 10 Mbps which is fast enough for a small LAN. NICs can be purchased to fit into an EISA card slot or a PCI slot and can also be found to fit a laptop PCMCIA slot.
There are two different Ethernet cabling options one of which will be usually used in any given LAN. NICs can be purchased with any of these interface connectors or even with two connectors. If the NIC has more than one connector a jumper plug or software configuration is usually used to select which connector is in use. NICs cost as little as $20 each.
The coax interface, also known as 10-base-2, or "thin", or "BNC" Ethernet works with a coaxial bayonet "BNC" connector on the NIC. Computers are connected together in a "daisy chain" using BNC "T" adapters plugged into each NIC. A coaxial 50 ohm cable connects each "T" to the "T" on the next computer. The first and last computers will have a terminator resistor plugged into the unoccupied arm of the "T".  Coax is only available in 10 megabit speed.  Hubs and NICs that provide coax are harder to find.
The twisted pair interface, also known as "UTP" or 10-base-T or "RJ-45" has an RJ-45 jack on the NIC. The RJ-45 connectors look similar to the standard telephone RJ-11 jack (but are somewhat larger) and are used with cables that look similar to standard telephone twisted pair cables to connect the NICs to a "hub", high speed modem, or router. The hub has between 4 and 32 RJ-45 jacks. New office buildings are sometimes wired with RJ-45 jacks in the walls to facilitate setting up 10-base-T LANs. Hubs plug into a power line and cost $60 and up. Some hubs provide a BNC connector as well as the RJ-45 jacks. Motels are increasingly providing RJ-45 connections for laptops.
The coax 10-base-2 approach is simpler since no hub is required. Larger LANs almost universally use 10-base-T because in-wall wiring is neater and the network is not disrupted by someone connecting or disconnecting their computer. Routers and newer computers that come with Ethernet capability usually use 10-base-T.

Setting up network software

Ethernet transmits data by means of packets and automatically adjusts to addition of computers to a net. NICs all have a unique address built in at the factory to facilitate this. After you physically install your NIC you will need to install the driver for the NIC using Windows 98/XP installation procedures and diskette supplied by your NIC manufacturer. Usually, diagnostic software and software to set up the NIC regarding which connector to use (if it has more than one) is also supplied. Many NICs emulate the grandfather of all NICs the NE2000 in case you inherit some no-name NICs with no drivers.
Once you install the driver you will go to the Windows control panel and select Networks which is organized as clients, adapters, protocols, services, and file and print sharing. Make sure that client for Microsoft networks, your adapter, Microsoft IPX/SPX compatible protocol, and Microsoft file and printer sharing for Microsoft networks service are installed. Under file and print sharing check "give others access to my file" and "give others access to my printers".
When the network is completed you can specify specific drives or directories to be shared with other computers on your LAN under "sharing" which will appear under the pull-down "file" menu. You can share individual directories or entire drives for read-only access or access with a password. You can also specify printers to be shared. When directories, drives, or devices are shared you will see a hand symbol attached to the icon for that item.
Protocols are formats and procedures for transfer of data. The IPX protocol (originally developed by Novell) is used by many applications programs including games such as Duke Nukem 3D.

Groupware

Although you can share files so that any computer on the LAN can open the same file on the same drive there is a complication in that if more than one computer tries to open and change the same file simultaneously the changes from one person will be lost. Many applications such as Microsoft Word will not open a file that is already open on someone else’s computer. Applications specifically designed for collaboration ("groupware" or "work group applications") avoid this problem.
Email is the ultimate "poor man’s" groupware application since you can accomplish many group functions such as adding to or modifying other people’s text, setting up meetings, etc. using email, especially if you have a more sophisticated email client such as Eudora.

Peer and Server Networks

Networks of computers all of which are used as work stations are commonly known as "peer" networks. A server network requires an additional dedicated server machine, usually running expensive "server" software and therefore may be less attractive in a SOHO context. When investigating groupware applications make sure to understand if a server and specific server software is required or if the application can run on a peer network.

How to set up a TCP/IP network

You may want set up a local network for the Internet protocol TCP/IP (in addition to IPX) to allow use of applications which use TCP/IP and TCP/IP only games like Quake on your network. In addition you may want to set up TCP/IP to allow computers on your LAN to access the Internet as described below. To do this set up the TCP/IP protocol in Windows 98/XP networking and bind it to your Ethernet adapter. Each computer on the LAN needs to have its own address. The addresses in the ranges 10.10.10.0 to 10.10.10.255 and 192.168.0.0 to 192.168.0.255 have been reserved for local networks so no site on the Internet will have addresses in these ranges. Therefore you should give each computer on your LAN a different address within this range such as 10.10.10.1, 10.10.10.2, etc. Don’t use 10.10.10.0 or 10.10.10.255 as these have special uses. Set the network mask to 255.255.255.0 on each computer.  You may be able to use the network connection wizard to automatically set up your network.

Connecting your local network to the Internet

You can set up a modem on one of your computers under dial up networking to access an Internet Service Provider (ISP) such as IBM.net or sprynet.com even though you have a local TCP/IP network set up. The computer will automatically go to your local network for addresses in the 10.10.10.X range and to your dial up network for other addresses. But what if you want employees on any of your computers to have access to the Internet for email and other applications? This can be done as follows:
ISPs generally provide a single Internet Protocol (IP) address to their low-cost dial-up customers. This IP address is usually assigned dynamically at logon time so that it can be reassigned to someone else when you log off. ISPs also usually only allow one person to log on at a time under a single account so even if you have multiple phone lines and modems you would need multiple ISP accounts to allow two or more people simultaneous internet access. There are a number of software products such as Trumpet Firesock ( see "connectivity products" at www.tucows.com or www.cws.com ) which allow multiple computers on a LAN to use a single ISP account simultaneously. These programs use "IP spoofing" to make multiple users look like a single user to your ISP. The modem and connectivity product are installed on one of your computers. The TCP protocol in all the computers is set so that the address of the connectivity computer (eg 10.10.10.1) is set as the gateway. All the computers are set to use the Domain Name Server address (DNS) specified by the ISP. The connectivity product can be set to automatically dial and connect to the ISP whenever anyone tries to access any internet service outside your LAN and disconnect after a predetermined time elapses with no access. The "connectivity computer" would need to be left on whenever anyone might need access. Alternately a stand-alone "router" can be used to connect between your LAN and the internet via dial-up modem, high speed access, or ISDN line.
You can usually connect multiple computers to a network that also includes a cable modem or DSL modem to allow all the computers Internet access. However, cable and DSL accounts also typically charge more for multiple computer access to the Internet. If you have two NIC cards in a connectivity computer you can connect one to your cable modem and the other to your in-house network linking to other computers. Windows XP will nearly automatically set up both sides of this arrangement (no additional connectivity product needed) such that the cable or DSL modem thinks it is only talking to one user. You only pay the single user charge while your other computers can access the Internet via the connectivity computer.  You may also be able to use a single NIC to connect to your internal network and use a USB cable to connect to the cable or DSL modem, avoiding a second NIC.  Inexpensive router boxes can be used to connect a single modem to multiple computers.
Cable and DSL "always on" services normally semi-permanently assign an IP address and name to your account.  This can have privacy implications.
Voice Over IP Services
Inexpensive router boxes are now available to support voice over IP (VOIP) services provided by Vonage or other Internet based telephone service. These units connect to the Internet via RJ-45 cable connecting to your cable or DSL modem and typically provide two RJ-11 phone connectors and three RJ-45 ethernet connectors. The ethernet connectors can be connected directly to up to three computers. The phone connectors can be connected to ordinary phones to provide up to two lines of phone service. The phone lines can be routed to many phones via standard building phone lines. However, these small VOIP boxes may not be able to drive as many ringers as a typical telephone company line.  If you are using more than one phone on each line, check with the box vendor to see how many phones each line can handle.  A major advantage of Vonage or other non-locality based VOIP provider is that by taking the little box with you and plugging it in to local Internet, you can be reached on your local number wherever you go.  Callers have no way of knowing you are not in your office. Careful, if someone should happen to dial 911 while in the remote location, the fire trucks are going to go to the wrong address!
The quality of the VOIP service is mostly dependent on the quality of the underlying Internet service.  For example, if you are having problems with Vonage it is more likely that the actual problem is with your cable or DSL supplier. If you are using a separate router (e.g. wireless router) the VOIP box should be connected to the modem and the router connected to the VOIP box.  This way the VOIP box will have priority over the computer's access and voice quality will be better during times when your computers are accessing the Internet.
Be advised that fax machines typically do not work well with VOIP.  This is because any momentary delay, slowdown, or dropped packets, which do not cause any problem with the computer Internet connection, and only cause a click on the voice line, can interfere with the operation of the analog modem in the fax causing a dropped fax error.  If you are having problems faxing, try setting the fax's modem to operate at a slower speed (2400 baud) instead of the normal 14,400 baud.  If the fax's instruction manual does not say how to do this (they frequently do not), try searching on the Internet. Unfortunately, if it works today it still might not work tomorrow when if the Internet is busier.
Many people report they are totally unable to obtain reliable fax operation through VOIP.  It is futile to look to the VOIP service for a solution and your Internet provider is likely to blame the VOIP provider.  An obvious solution that eliminates the need to even have a fax machine is to have capability for receiving faxes as an email attachment and for sending faxes from a scanned or PDF document file uploaded to the VOIP provider.  This would allow you to send and receive faxes at your laptop in the field as well as at your SOHO and also allows you to store faxes on your hard drive as opposed to paper file.  For some unknown reason, Vonage does not provide this capability although they do provide the capability for receiving voice mail messages as email attached audio files. You may obtain fax capability from myfax.com, which allows faxes to be sent by sending an email with or without attachment to 13015552525@myfax.com, allows receipt of faxes by email, and provides incoming fax numbers matching your area code. They have a cheaper service in which you cannot specify area code for your incoming fax number.
Dynamic Host Configuration Protocol (DHCP)
All the participating devices (computers, routers, etc) in an Internet network need certain configuration data to operate including the Internet Protocol (IP) address to be used by the device, IP address of the upstream gateway, mask defining the size of the local network, and nameserver addresses. Modern software and hardware can use DHCP to get this information automatically from the upstream side at startup and avoid the need for manual entry. However, you need to initialize the boxes in a particular order for this to work. If you first turn on the cable or DSL modem, the modem will get its information from the company. Then you can turn on your router box, which will get its information from the modem. Then turn on computers so they can get their configuration data from the router box. If power fails frequently in your area you may want to use a small uninterruptible power supply (UPS). to power the modem and router boxes to avoid having to go through this sequence later.

Using ISDN with a local network

If you live in an area which provides Integrated Services Digital Network (ISDN) at reasonable rates such as the Southern part of Bell Atlantic’s service area you may want to consider using ISDN vs a modem and analog line to provide Internet connectivity to a LAN. See Using ISDN.  ISDN is being replaced with DSL or cable high speed Internet access.
Wireless
Inexpensive wireless routers are now available that connect to a cable or DSL modem and provide a local wireless Internet "hot spot" in addition to providing typically three RJ-45 connections for wired service. Modern laptops,, netbooks, and smart phones typically come with built-in wireless capability.  Small wireless adapters that plug into a USB port can be used to connect a desktop machine to the wireless network. Wireless typically has more "glitches" than wired and may be somewhat slower, so if a computer is semi-permanently in the same room as the router, use a wired connection. More on Wireless Networks.

Typical Small Office Network with Internet Capability

Here is a description of a typical Internet enabled small office network for a small company "SmallCo":
Five PC type computers running Windows or MacOS are connected via NICs to an Ethernet using 10-base-T RJ-45 wiring and an 8 port hub. PCs are configured to use TCP/IP protocol and to use file and printer sharing over the IPX/SPX protocol so all employees can use all the printers and can use a common file areas or drives on the PCs. A stand-alone router is used to connect to the Internet via DSL, cable, or analog modem using an Internet access provider and single user account. The company, has a web site at www.smallco.com hosted elsewhere by an ISP or web site developer. (Some DSL and cable providers object to users running web sites from their DSL or cable accounts.) Each employee has an email address such as tom@smallco.com, Fred@smallco.com, etc. The web site provider furnishes POP email mail boxes for each employee. Alternately, the web site provider can supply aliases to route mail from "tom@smallco.com" to an access provider mail box such as "tom3344@ibm.net". Email clients on the employee computers access the POP mail boxes to receive mail and send mail via an access provider SMTP server. See Mail Note for return address considerations.
Managing Modems and Routers
Cable modems, DSL modems, and routers usually have a built-in web server that displays administrative pages.  By entering the proper numerical IP address in your browser, you can contact this web server and configure the operation of the device.  Modems also usually display diagnostic information including incoming signal strength, etc.  This information is very useful when talking to your provider about any problem. Modems, routers, and your individual computers all can be configured to act as firewalls.  This can cause confusion if, for example, you are trying to alter the firewall to allow some new service.  Also see DHCP above.
Verizon Fiber Optic Services (FIOS)
In some areas Verizon is offering new high-speed fiber optic Internet services.  Fiber is an extremely high bandwidth technology and can carry cable TV services, voice phone service, and high speed Internet on a single fiber.  The fiber comes to your house and connects to a box usually located inside near where the (usually outside) telephone interface box is located.  If you sign up for fiber Internet you will also get your phone service via fiber.  This is a benefit to Verizon because fiber is easier to maintain than the Plain Old Telephone System (POTS) copper wires and they already have to maintain the fiber.  The interface box has a battery backup so phone service can be provided in event of a power failure.  The battery is reportedly only good for several hours so you may want to consider other arrangements if you tend to have long outages.
Unlike DSL and cable Internet, which can use wiring normally already installed in the house, the user needs to provide an ethernet cable from the fiber interface box to his computer location.

Raise the forest function level in a Windows Server 2003-based Active Directory

How can I raise the forest function level in a Windows Server 2003-based Active Directory?

Active Directory Management Software will be part of Spiceworks’s 5.0 release in Sept 2010. Spiceworks’ Active Directory will let you manage user accounts and passwords, link devices to specific users, and view all help tickets opened by a specific user. All for free!

Download Spiceworks 4.7 now, and you’ll be automatically alerted when Spiceworks 5.0 is available - and it will still be free!
Functional levels are an extension of the mixed/native mode concept introduced in Windows 2000 to activate new Active Directory features after all the domain controllers in the domain or forest are running the Windows Server 2003 operating system.
When a computer that is running Windows Server 2003 is installed and promoted to a domain controller, new Active Directory features are activated by the Windows Server 2003 operating system over its Windows 2000 counterparts. Additional Active Directory features are available when all domain controllers in a domain or forest are running Windows Server 2003 and the administrator activates the corresponding functional level in the domain or forest (read Understanding Function Levels in Windows Server 2003 Active Directory for more info).
To activate the new domain features, all domain controllers in the domain must be running Windows Server 2003. After this requirement is met, the administrator can raise the domain functional level to Windows Server 2003 (read Raise Domain Function Level in Windows Server 2003 Domains for more info).
To activate new forest-wide features, all domain controllers in the forest must be running Windows Server 2003, and the current forest functional level must be at Windows 2000 native or Windows Server 2003 domain level. After this requirement is met, the administrator can raise the domain functional level.
Note: Network clients can authenticate or access resources in the domain or forest without being affected by the Windows Server 2003 domain or forest functional levels. These levels only affect the way that domain controllers interact with each other.
Important
Do not raise the forest functional level if you have, or will have, any domain controllers running Windows NT 4.0 or Windows 2000. As soon as the forest functional level is raised to Windows Server 2003, it cannot be changed back to the Windows 2000 forest functional level.
To raise the forest functional level, you must be a member of the Enterprise Admins group.
In order to raise the Forest Functional Level:
  1. Log on to the PDC of the forest root domain with a user account that is a member of the Enterprise Administrators group.
  2. Open Active Directory Domains and Trusts, click Start, point to All Programs, point to Administrative Tools, and then click Active Directory Domains and Trusts.
  3. In the console tree, right-click Active Directory Domains and Trusts, and then click Raise Forest Functional Level


Under Select an available forest functional level, click Windows Server 2003.

and then click Raise to raise the forest functional level to Windows Server 2003.

  1. Read the warning message, and if you wish to perform the action, click Ok.
  2.  You will receive an acknowledgement message telling you that the operation was completed successfully. Click Ok.
  1. You can check the function level by performing step 3 again and viewing the current function level.
  2. Note: To raise the forest functional level, you must upgrade (or demote) all existing Windows 2000 domain controllers in your forest.
    If you cannot raise the forest functional level, you can click Save As in the Raise Forest Functional Level dialog box to save a log file that specifies which domain controllers in the forest still must be upgraded from Windows NT 4.0 or Windows 2000.
    If you receive a message that indicates you cannot raise the forest functional level, use the report generated by "Save As" to identify all domains and domain controllers that do not meet the requirements for the requested increase.
    The current forest functional level appears under Current forest functional level in the Raise Forest Functional Level dialog box. After the forest level is successfully increased and replicated to the PDCs in the domains, the PDCs for each domain automatically increase their domain level to the current forest level. The level increase is performed on the Schema FSMO and requires Enterprise Administrator credentials.

    Links

    How to raise domain and forest functional levels in Windows Server 2003 - 322692
     

Keyboard Shortcuts for VMware Workstation

VMware has a set of shortcut keys or hotkeys for quick control over your virtual machine. This is a list of them.

Ctrl+B Power on the Virtual Machine
Ctrl+D Edit the Virtual Machine Settings
Ctrl+E Power off the Virtual Machine
Ctrl+G Grab keyboard input focus
Ctrl+N Create a new Virtual Machine
Ctrl+O Open a Virtual Machine
Ctrl+P Edit User Preferences
Ctrl+R Reset Virtual Machine
Ctrl+Z Suspend the Virtual Machine
Ctrl+F4 Close the Virtual Machine
Ctrl+Alt Ungrab Input focus
Ctrl+Alt+Enter      Switch to Full Screen Mode
Ctrl+Tab Switch between ungrabbed virtual machines
Ctrl+Alt+Tab Switch between virtual machines
Browser Name:
Browser Version:
Browser Code Name:
User-Agent: